Hey everyone! If you’ve ever owned a car long enough, you know that plastic auto trim takes a beating—curb scratches, rock chips, that faint sun-faded haze that makes even a well-kept vehicle look a little rough around the edges. I’m not just some random blogger giving advice; I’m the owner of a small business that specializes in painting plastic auto trim, and I’ve seen it all over the years. Whether it’s a scratch on your bumper, a scuff on your side molding, or that faded mirror cap that’s been bugging you, touching up plastic trim paint isn’t as scary as it sounds—as long as you do it the right way. Let’s walk through this step by step, no fancy jargon, just what actually works from someone who’s handled thousands of trim pieces. Painting Plastic Auto Trim

First off, let’s get one thing straight: plastic isn’t like metal. Metal paint adheres differently, and if you use the wrong products on plastic, your touch-up will peel, chip, or look like a hot mess in a matter of months. I’ve had customers come to me with DIY jobs they tried that lasted two weeks before flaking off, so trust me when I say prep is everything here. Skipping steps just to “get it done fast” will cost you more time and money later—ask me how I know (hint: I’ve re-done trim for clients who tried that shortcut).
Let’s start with picking the right spot to work. You don’t want to do this in the middle of a windy driveway, right? Dust and debris will land in your wet paint, and there’s nothing worse than a tiny speck ruining your hard work. Pick a covered, well-ventilated area—like a garage with the door open, or a shaded spot outside where there’s no direct sun. Direct sun will make the paint dry too fast, leading to streaks, and humidity can cause bubbles. Aim for a day that’s between 60-85°F (15-29°C) with low wind—perfect conditions.
Next, you need to gather your supplies, and don’t go grabbing random stuff from the hardware store. Here’s my go-to list for touch-ups that actually last: first, a plastic-specific cleaner (not dish soap—dish soap leaves a residue that kills paint adhesion). We use a professional-grade trim prep at our shop, but for DIYers, isopropyl alcohol (91% or higher) works great to cut grease and grime. Then, a fine-grit sanding pad—2000 grit is ideal, because it’s not too harsh that it scratches the plastic, but it scuffs the surface just enough so the paint sticks. Skip the coarse sandpaper; that’ll leave deep scratches you can’t buff out later. You’ll also need a plastic adhesion promoter—this is non-negotiable. Regular primer doesn’t work on plastic, and adhesion promoter is what bridges the gap between the plastic and paint. Then, the right paint: water-based acrylic urethane is our go-to for OEM-matched colors, but there are great aerosol options now too—just make sure it’s labeled for plastic trim, not for metal. Finally, microfiber cloths (lint-free is key), masking tape, and a steady hand (a small detail brush is perfect for tight spots, like along edges).
Now, let’s break down the steps, starting with removing the trim if you can. Wait—do you have to take it off? Not always, but if the trim is on a part of the car that’s in your way (like the lower bumper, where you bend over a lot), taking it off is way easier. You can look up a quick guide for your specific make and model (most have plastic clips that pop off with a flathead screwdriver—just be gentle, you don’t want to break the clips). If you can’t remove it, no problem—just cover the surrounding car parts really well with masking tape and newspaper. Pro tip: press the tape down firmly along the edge of the trim so no paint bleeds under.
Once your work area is set and supplies are out, step one is cleaning the trim. Start by wiping it down with the 91% isopropyl alcohol and a lint-free cloth, making sure to get every inch—even the parts that look “clean.” We actually pressure wash all trim pieces at our shop first to get rid of road grime, bug guts, and that old wax that’s built up over time, so don’t skip this step. Let it dry completely—like, 10-15 minutes, don’t rush it. Dampness under paint is a recipe for peeling.
Next, the sanding part. You don’t need to sand the entire trim, just the area that’s damaged or faded. If it’s a small scratch, sand only that spot. If it’s a faded mirror cap, lightly scuff the whole cap—this ensures the new paint lays evenly. Don’t press too hard with the sanding pad; you just want to take the gloss off the plastic, not make it look dull or scratched. Wipe away all the sanding dust with another lint-free cloth (or a tack cloth, if you have one) after sanding. Dust left on there will make the paint have a rough texture, like orange peel.
Here’s the make-or-break step: the adhesion promoter. Shake it really well (seriously, shake it for 1-2 minutes—those ingredients separate fast), then spray a light, even coat over the scuffed area. Don’t soak it; a thin mist is all you need. Let it dry for the time the label says—usually 5-10 minutes. If you skip this, I can almost guarantee your paint will flake off in a few months. I’ve seen it too many times to count, and it’s not pretty.
Now, the paint. Shake your plastic-specific paint for at least 2 minutes—no shortcuts here. If it’s an aerosol, hold it 6-8 inches away from the trim, and do very light, sweeping passes. Don’t spray it all on in one thick coat; that will run, and runs are impossible to fix once they dry. The first coat should be thin—like a mist. Let it dry for 10-15 minutes, then do a second thin coat, overlapping the first pass by half so it lays evenly. If you need a third coat (for deeper scratches or extra coverage), wait another 10 minutes before applying it. Pro tip: if you’re using a detail brush for tight spots, dab the paint on instead of brushing, to avoid streaks.
Wait for it to cure—this is important. A lot of people think touch-up paint is dry in an hour, but it takes time to harden properly. Most paints need 24 hours to fully cure, so don’t wash your car or touch the trim during that time. If you do, you might scratch the new paint before it’s ready. Once it’s cured, you can do a light buff with a microfiber cloth if you want to make it shine, to match the rest of the trim.
Now, let’s talk about common mistakes I see every day, because these are the ones that ruin DIY touch-ups. First, using regular metal paint—never. Plastic has a different thermal expansion rate than metal, so metal paint cracks and peels off plastic super fast. Second, skipping the adhesion promoter—like I said, non-negotiable. Third, not cleaning the trim properly—old wax or grease is a paint killer. Fourth, applying too much paint at once—thin coats always win, every single time. Fifth, working in bad conditions—wind blows dust, sun dries too fast, humidity causes bubbles. Trust me, I’ve been there.
If you’re thinking “this sounds like a lot of work” or your trim has bigger issues (like deep chips, oxidation that’s way too faded, or multiple trim pieces that need repainting), that’s where we come in. We specialize in painting plastic auto trim, using OEM-matched colors and professional products that are designed to last for years, not months. We take every trim piece off, prep it properly (we sand, clean, prime, the whole nine yards), and spray it in a controlled, dust-free booth, so you get a finish that looks just like factory fresh. No DIY headaches, no failed touch-ups, just trim that matches the rest of your car.
If you’ve tried touching up your trim before and it didn’t turn out how you wanted, or you’re ready to upgrade your car’s look with perfectly matched trim paint, feel free to reach out to talk through your needs. We work with all makes and models, from daily drivers to classic cars, and we can give you a fair, transparent quote for whatever project you have.
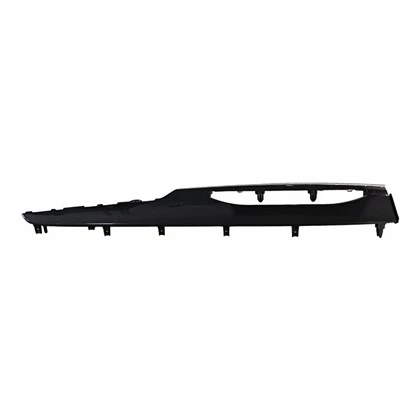
And one last thing—don’t be afraid to ask questions. A lot of our first-time customers are nervous about painting their trim, but we’re here to help, whether you want to do it yourself or let us handle it. That’s it for this post—good luck with your trim touch-ups, and let me know how it goes if you give it a shot!
Car Door Trim Exterior References:
- Society of Automotive Engineers. (2020). Adhesion Requirements for Painted Automotive Thermoplastics. SAE International.
- Plastics Industry Association. (2019). Surface Preparation Methods for Automotive Exterior Plastic Components. PIA Technical Bulletin.
- Automotive Touch-Up Products Association. (2021). Best Practices for Plastic Trim Paint Application. ATPA Guidelines.
Hebei Xiujie Auto Parts Co., Ltd.
As one of the most professional painting plastic auto trim manufacturers and suppliers in China, we have world-leading production equipment and strong manufacturing capabilities. Please feel free to wholesale bulk customized painting plastic auto trim from our factory. Contact us for quotation and free sample.
Address: Industrial New Area, Wen’an County, Langfang City, Hebei Province (State-run Xiaowu Farm)
E-mail: runtaoli87@gmail.com
WebSite: https://www.xiujie-cn.com/
